Easy Oreo Milkshake: An Incredible 3-Ingredient Recipe
Easy Oreo Milkshake is an amazing treat that packs a punch of flavor and delight. With just three simple ingredients, this milkshake is not only quick to prepare but also incredibly satisfying. Whether it’s a hot summer day or you’re just in the mood for something sweet and creamy, this milkshake will hit the spot. Imagine sipping on a sweet, velvety blend of ice cream and crushed Oreos, bringing back childhood memories with every delicious gulp.
This milkshake is perfect for any occasion—be it a fun family gathering, a casual hangout with friends, or even an after-dinner treat that will wow your guests. Its delightful simplicity comes from the combination of flavors that pair perfectly together, creating a drink that is both nostalgic and indulgent. You’re about to discover why this Easy Oreo Milkshake is going to be your new go-to recipe for delicious desserts.
In this guide, we’ll break down everything you need to know to whip up this incredible treat, from the reasons you’ll love it to the step-by-step instructions. So grab your blender, and let’s dive into the world of delicious milkshakes!
Why You’ll Love This Easy Oreo Milkshake
One of the standout features of the Easy Oreo Milkshake is its simplicity, yet it delivers an extraordinarily delightful taste. Here are some reasons why you’ll absolutely adore this recipe:
1. Few Ingredients: With only three ingredients, this milkshake is incredibly easy to make. No complicated techniques required!
2. Quick Preparation: You’ll be enjoying this tasty treat in just a few minutes, making it perfect for when cravings strike.
3. Versatile Treat: While Oreos are the star here, feel free to customize your milkshake by dividing the fun with other ingredients like whipped cream or chocolate syrup.
4. Perfect for Everyone: This milkshake is a hit with both kids and adults, making it a wonderful choice for family gatherings or parties.
5. No Special Equipment: All you need is a blender, so you can start blending right away without any fuss.
6. Rich and Creamy Indulgence: The combination of Oreos and ice cream creates a flavor and texture that is simply irresistible.
With all these features, it’s clear why this Easy Oreo Milkshake stands out among dessert choices. Each sip offers a perfect balance of sweetness with a crunch that will leave you wanting more!
Preparation and Cooking Time
Creating an Easy Oreo Milkshake is not only delicious but also efficient. Here’s a breakdown of the total time involved in making this delightful beverage:
– Preparation Time: 5 minutes
– Blending Time: 2 minutes
– Total Time: 7 minutes
This speed makes it easy to whip up whenever you’re in the mood for a sweet treat or want to impress guests with minimal effort.
Ingredients
– 2 cups vanilla ice cream
– 1 cup milk
– 6 Oreo cookies
Step-by-Step Instructions
Making the Easy Oreo Milkshake is a straightforward process that requires only a few simple steps. Follow this guide for a perfect shake every time:
1. Gather the Ingredients: Ensure you have all ingredients ready before you start.
2. Add Ice Cream: In a blender, scoop 2 cups of vanilla ice cream. This will form the creamy base of your milkshake.
3. Pour in Milk: Next, add 1 cup of milk to the blender. This helps create the desired milkshake consistency.
4. Crush the Oreos: Take the 6 Oreo cookies and add them to the blender. You can crush them beforehand if you prefer a smoother texture.
5. Blend: Blend all the ingredients together until smooth. Make sure there are no large chunks left—aim for a creamy consistency.
6. Taste Test: Once blended, taste your milkshake. If you prefer it sweeter, feel free to add more cookies or a splash of chocolate syrup.
7. Serve Immediately: Pour the milkshake into tall glasses or mason jars for a fun presentation.
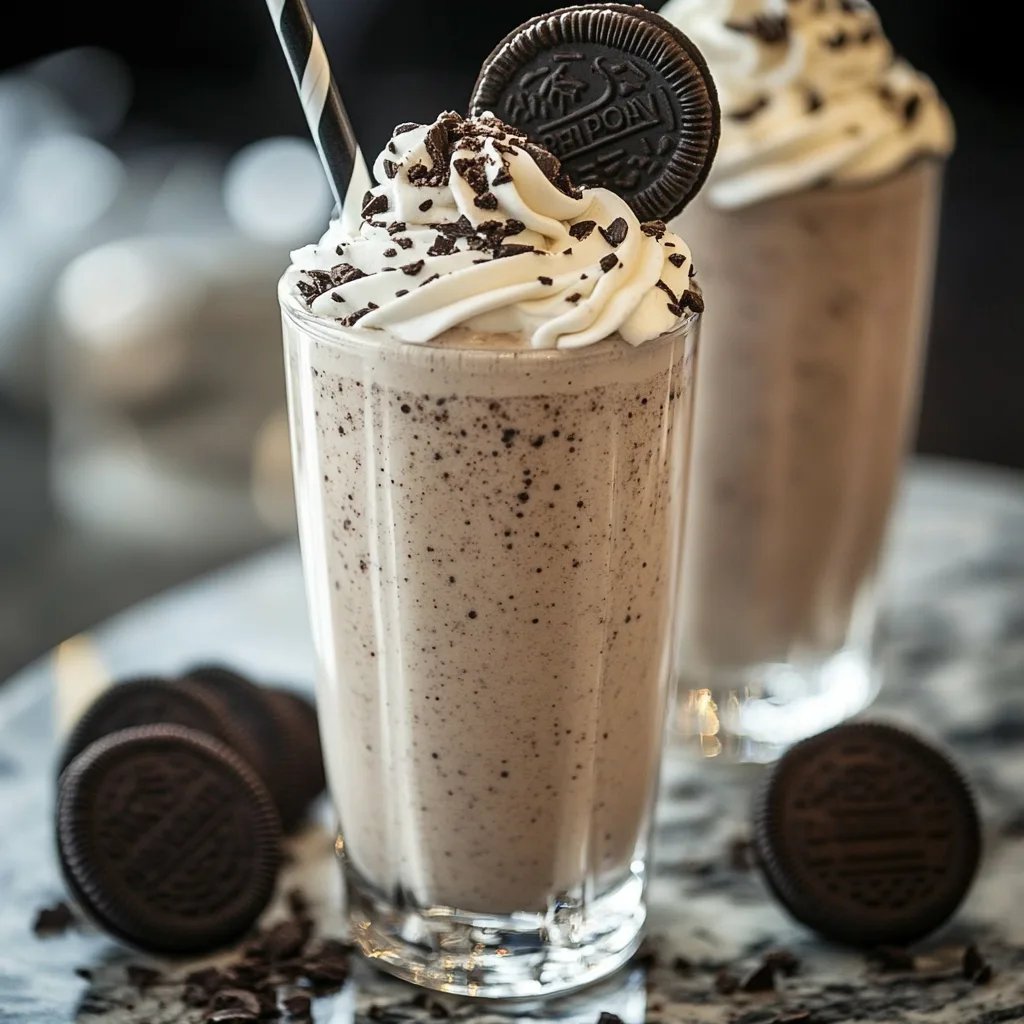
8. Garnish (Optional): Top with whipped cream, crushed Oreos, or a drizzle of chocolate for an added touch.
These steps will help you create the most delightful Easy Oreo Milkshake in no time!
How to Serve
Serving your Easy Oreo Milkshake can enhance the experience for you and your guests. Here are some tips for making your milkshake presentation exciting:
1. Presentation Glassware: Use tall glasses or decorative mason jars to serve the milkshake. They add a touch of fun and elegance.
2. Garnish: Consider topping your milkshake with whipped cream and a sprinkle of crushed Oreos. This not only looks appealing but also adds extra flavor.
3. Straws or Spoons: Provide colorful straws or spoons for guests to enjoy their shakes. A fun touch can make even a simple treat feel special.
4. Serve with Snacks: Consider offering cookies, mini donuts, or brownie bites on the side for an indulgent snack platter.
5. Chill Your Glasses: For an added frosty experience, chill your glasses in the freezer for a few minutes before serving.
With these serving tips, you’re bound to impress everyone who tries your Easy Oreo Milkshake, making it an unforgettable treat!
Additional Tips
– Experiment with Ice Cream Flavors: While vanilla is standard, chocolate or cookies and cream ice cream can provide a unique twist.
– Use Cold Ingredients: For a thicker milkshake, make sure your milk and ice cream are as cold as possible.
– Blend to Your Preference: Adjust the blending time if you prefer your milkshake chunky with bits of cookies, or blend longer for a smoother texture.
– Add a Pinch of Salt: A tiny pinch of salt can elevate the sweetness and enhance the overall flavor profile.
Recipe Variation
Feel free to get creative! Here are some fun variations to consider:
1. Mint Oreo Milkshake: Add a few drops of peppermint extract for a refreshing twist on the classic.
2. Peanut Butter Oreo Milkshake: Mix in a tablespoon of peanut butter for a delightful nutty flavor.
3. Salted Caramel Oreo Milkshake: Drizzle caramel sauce into the blender for a rich and sweet addition.
4. Coffee Oreo Milkshake: Blend in a shot of cooled espresso for a caffeinated kick.
Freezing and Storage
– Storage: Store any leftover milkshake in the freezer for up to a week. Ensure it’s in a sealed container to prevent ice crystals from forming.
– Thawing: When ready to enjoy, let it sit at room temperature for a few minutes before stirring and serving.
Special Equipment
You’ll need minimal equipment to whip up this Easy Oreo Milkshake. Here’s what you’ll require:
– Blender: A good-quality blender is essential for achieving a creamy texture.
– Measuring Cups: To ensure perfect ingredient ratios.
– Tall Glasses or Mason Jars: For serving and making the milkshake presentation appealing.
Frequently Asked Questions
Can I use low-fat ice cream or milk?
Yes, feel free to use low-fat options, though the milkshake may have a different texture.
How can I make this milkshake dairy-free?
Substitute regular ice cream and milk with dairy-free alternatives like almond or coconut ice cream and plant-based milk.
Is it possible to make this milkshake ahead of time?
It’s best to consume it freshly made to enjoy the best texture. However, you can prepare the ingredients in advance and blend when ready to serve.
What if I want a thicker milkshake?
Add an additional scoop of ice cream. If it’s too thick, just incorporate a bit more milk until reaching your desired consistency.
Can I use other cookies?
Absolutely! Try using different sandwich cookies, like chocolate cream, for a fun alternative.
Conclusion
The Easy Oreo Milkshake is a straightforward yet irresistible treat that deserves a place in your dessert repertoire. With only three ingredients, it makes for an effortless treat to whip up at any time, bringing joy to both children and adults alike. Each sip is a delicious reminder of those nostalgic flavors we all love, making it perfect for any gathering or a comforting solo snack. Remember, the beauty of this recipe lies in its versatility, so feel free to explore different variations and make it your own!