The Best Dutch Apple Pie Recipe: A Wonderful Ultimate Guide
The Best Dutch Apple Pie Recipe is a delightful treat that combines sweet and tart flavors, enveloped in a flaky crust topped with a crumbly streusel. This classic dessert is cherished by many and is often a centerpiece during family gatherings and special occasions. Imagine a warm slice of pie fresh from the oven, filling your kitchen with an aroma that evokes feelings of nostalgia and togetherness.
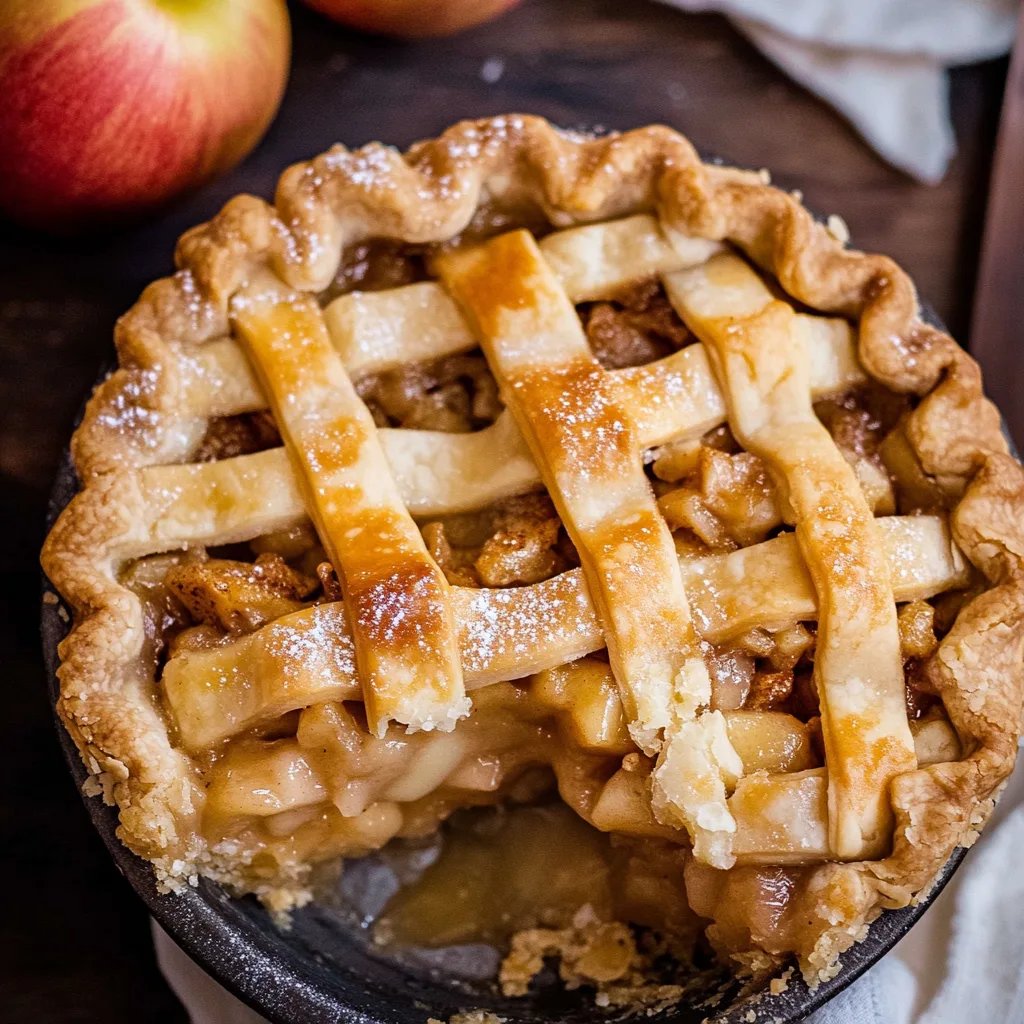
The beauty of the Dutch apple pie lies in its simplicity and rich flavor profile. It features tender, cinnamon-spiced apples that create a luscious filling, perfectly balanced by the crisp streusel topping. This pie is not just a dessert; it’s an experience, a celebration of flavors that brings smiles to people’s faces. Whether you’re a novice baker or a seasoned professional, this recipe is designed to be easy to follow, ensuring that you can share this amazing dessert with loved ones.
Once you bite into a slice of this pie, you will discover its rich, buttery flavor, the delightful crunch of the topping, and the tender apple filling that dances on your palate. This recipe stands out not only for its taste but also for the joy it brings to those who enjoy it. In this guide, you’ll find out why this recipe deserves a spot in your kitchen, along with detailed preparation instructions so you can create your very own Dutch apple pie masterpiece.
Let’s explore the factors that make The Best Dutch Apple Pie Recipe a must-try for anyone who loves baking!
Why You’ll Love This Recipe
The Best Dutch Apple Pie Recipe is cherished for several reasons, making it an excellent choice for any occasion. Here are some wonderful aspects that will make you fall in love with this recipe:
1. Delicious Flavor Combination: The blend of sweet and tart apples with aromatic spices creates an irresistible filling that complements the rich topping.
2. Generous Serving Size: This recipe yields a pie that can feed a crowd, perfect for potlucks or family gatherings.
3. Versatile Enjoyment: It can be served warm, at room temperature, or chilled, with options for toppings like vanilla ice cream or whipped cream.
4. Simplicity of Preparation: Even if you are new to baking, the clear instructions make it easy to succeed.
5. All-Season Treat: While ideal for fall, this pie is delightful year-round, making it a versatile dessert option.
6. Classic Comfort Food: The warmth of a freshly baked Dutch apple pie has a way of evoking feelings of home and nostalgia.
With all these appealing qualities, it’s easy to understand why this Dutch apple pie recipe is adored by many. Whether you’re crafting it for a special event or just for a treat, this pie is sure to bring joy to the table!
Preparation and Cooking Time
The total time needed to create The Best Dutch Apple Pie is approximately 1 hour and 45 minutes, covering everything from preparation to baking. Here is a detailed breakdown of the time involved:
– Preparation Time: 30 minutes
– Cooking Time: 1 hour
– Cooling Time: 15 minutes
These times may fluctuate slightly based on your baking experience and kitchen appliances, but this framework should give you a solid guideline for your baking session.
Ingredients
– For the Pie Crust:
– 2 ½ cups all-purpose flour
– 1 teaspoon salt
– 1 tablespoon granulated sugar
– 1 cup unsalted butter, chilled and diced
– 6-8 tablespoons ice water
– For the Apple Filling:
– 6 to 8 medium-sized apples, peeled, cored, and sliced
– ¾ cup granulated sugar
– 1 tablespoon lemon juice
– 1 teaspoon ground cinnamon
– ¼ teaspoon nutmeg
– 2 tablespoons all-purpose flour
– For the Streusel Topping:
– 1 cup all-purpose flour
– ¾ cup rolled oats
– ½ cup brown sugar, packed
– ½ cup unsalted butter, melted
– 1 teaspoon ground cinnamon
– 1/4 teaspoon salt
Step-by-Step Instructions
Creating The Best Dutch Apple Pie is straightforward when you follow these easy steps:
1. Prepare the Pie Crust:
– In a large bowl, mix the flour, salt, and sugar.
– Cut in the diced butter until the mixture resembles coarse crumbs.
– Stir in the ice water, one tablespoon at a time, until the dough comes together.
– Divide the dough in half, shape into discs, wrap in plastic, and refrigerate for at least 30 minutes.
2. Prepare the Apples:
– In a big bowl, toss the sliced apples with lemon juice, granulated sugar, cinnamon, nutmeg, and flour until well combined.
– Set aside and let them marinate for about 10 minutes.
3. Make the Streusel Topping:
– In another bowl, combine flour, oats, brown sugar, cinnamon, and salt.
– Pour in the melted butter and mix until everything is well combined and crumbly.
4. Roll out the Pie Crust:
– Preheat your oven to 425°F (220°C).
– Roll out one chilled dough disc on a floured surface to fit a 9-inch pie pan. Place the dough in the pan, trimming the excess.
5. Fill the Pie:
– Pour the apple filling into the pie crust, spreading it evenly.
6. Top with Streusel:
– Evenly sprinkle the streusel topping over the apple filling.
7. Bake the Pie:
– Place the pie in the preheated oven and bake for 15 minutes.
– Then, reduce the temperature to 350°F (175°C) and continue to bake for 40-45 minutes, or until the apples are tender and the topping is golden brown.
8. Cool the Pie:
– Remove the pie from the oven and allow it to cool on a wire rack for about 15 minutes before serving.
Following these steps will lead you to an incredible homemade Dutch apple pie that is sure to impress!
How to Serve
When it comes to serving The Best Dutch Apple Pie, here are some tips to enhance the experience:
1. Presentation: Slice the pie into generous wedges and serve on a decorative pie plate or cake stand for an impressive display.
2. Toppings: Top each slice with a scoop of vanilla ice cream or freshly whipped cream to elevate the flavors beautifully.
3. Beverage Pairing: Serve with a warm cup of spiced cider, coffee, or a scoop of vanilla gelato for a delightful contrast.
4. Garnish: A sprinkle of cinnamon or a drizzle of caramel sauce over the top can add a beautiful touch to your presentation.
5. Storage: If you have leftovers, keep the pie covered at room temperature for up to 2 days or refrigerate for up to a week.
By considering these serving suggestions, you’ll create a wonderful experience that will leave lasting memories in every slice! Enjoy your baking adventure with The Best Dutch Apple Pie Recipe!
Additional Tips
– Choose the Right Apples: For the best flavor, select a mix of sweet and tart apples, such as Granny Smith and Honeycrisp. This balance enhances the pie’s overall taste.
– Spice It Up: Don’t hesitate to adjust the spices according to your preference. Adding a pinch of cardamom or ginger can elevate the filling’s flavor.
– Ensure Even Slicing: When slicing your apples, try to keep them uniform in size. This ensures they cook evenly and contribute to a consistent texture in the filling.
– Pre-Bake the Crust: If you prefer a crisper crust, consider pre-baking the pie crust for about 10 minutes before adding the filling. This step can help prevent a soggy bottom.
– Use an Egg Wash: For an attractive golden color on your crust, brush it with an egg wash (beaten egg mixed with water) before baking.
Recipe Variation
Feel free to get creative with this Dutch apple pie recipe. Here are some fun variations you can try:
1. Pecan Topping: Add chopped pecans to the streusel topping for an added crunch and nutty flavor that pairs beautifully with the apples.
2. Cinnamon Roll Inspiration: Swirl some cinnamon and brown sugar into the apple filling for a delightful cinnamon roll flavor that complements the pie.
3. Cheddar Cheese Addition: A classic pairing from certain regions is to serve a slice of Dutch apple pie with a sharp cheddar cheese topping. You can also incorporate grated cheddar into the pie crust for a unique taste twist.
4. Gluten-Free Option: Swap the all-purpose flour for a gluten-free blend to make the pie accessible to gluten-sensitive guests.
5. Dried Fruits: Mix in some dried cranberries or raisins with the apples for added sweetness and interesting texture.
Freezing and Storage
– Storage: Properly covered, your Dutch apple pie can be stored at room temperature for up to two days. For extended freshness, refrigerate it for up to a week.
– Freezing: If you want to enjoy your pie later, it can be frozen. Cover it well with plastic wrap and aluminum foil to prevent freezer burn. It will maintain its quality in the freezer for up to three months. When ready to serve, thaw in the refrigerator overnight and reheat in the oven for the best texture.
Special Equipment
Though this recipe is straightforward, some equipment will make your baking experience easier:
– Rolling Pin: Essential for rolling out the pie crust to the desired thickness.
– 9-inch Pie Pan: A standard size for the perfect pie which allows for even baking.
– Mixing Bowls: For preparing different components such as the filling, crust, and streusel topping.
– Pastry Cutter or Fork: Useful for cutting butter into the flour for the crust, helping achieve the right crumbly texture.
– Wire Rack: Helps cool the pie evenly and prevents a soggy bottom after baking.
Frequently Asked Questions
Can I use store-bought pie crust?
Yes, pre-made pie crusts can save time and still yield a delicious pie.
What types of apples are best for baking?
A combination of tart and sweet apples, such as Granny Smith and Fuji, works best for a balanced flavor.
How can I tell when the pie is done?
The pie is ready when the apples are tender and the streusel topping is golden brown. You can also check if juices are bubbling up around the edges.
Can I make the pie ahead of time?
Yes, you can prepare the pie a day in advance and store it in the refrigerator until you are ready to bake. Just remember to add a few extra minutes to the baking time if it’s cold from the fridge.
What can I use instead of butter?
For a dairy-free version, consider using coconut oil or a dairy-free margarine in the crust and streusel.
Conclusion
The Best Dutch Apple Pie Recipe is not just a dessert but a heartfelt experience that bridges generations. With its beautiful blend of flavors, treasured memories, and the aroma that fills your kitchen, this pie is perfect for any occasion. Whether served warm with a scoop of ice cream or enjoyed at room temperature, each bite offers comfort and joy. Make this classic recipe yours, and let it become part of your family’s traditions.